The Dashboard is the default screen for each user upon login to the e-Filing application. Comprised of nine sections, the dashboard is a simplified hub for electronically filing documents with the court:
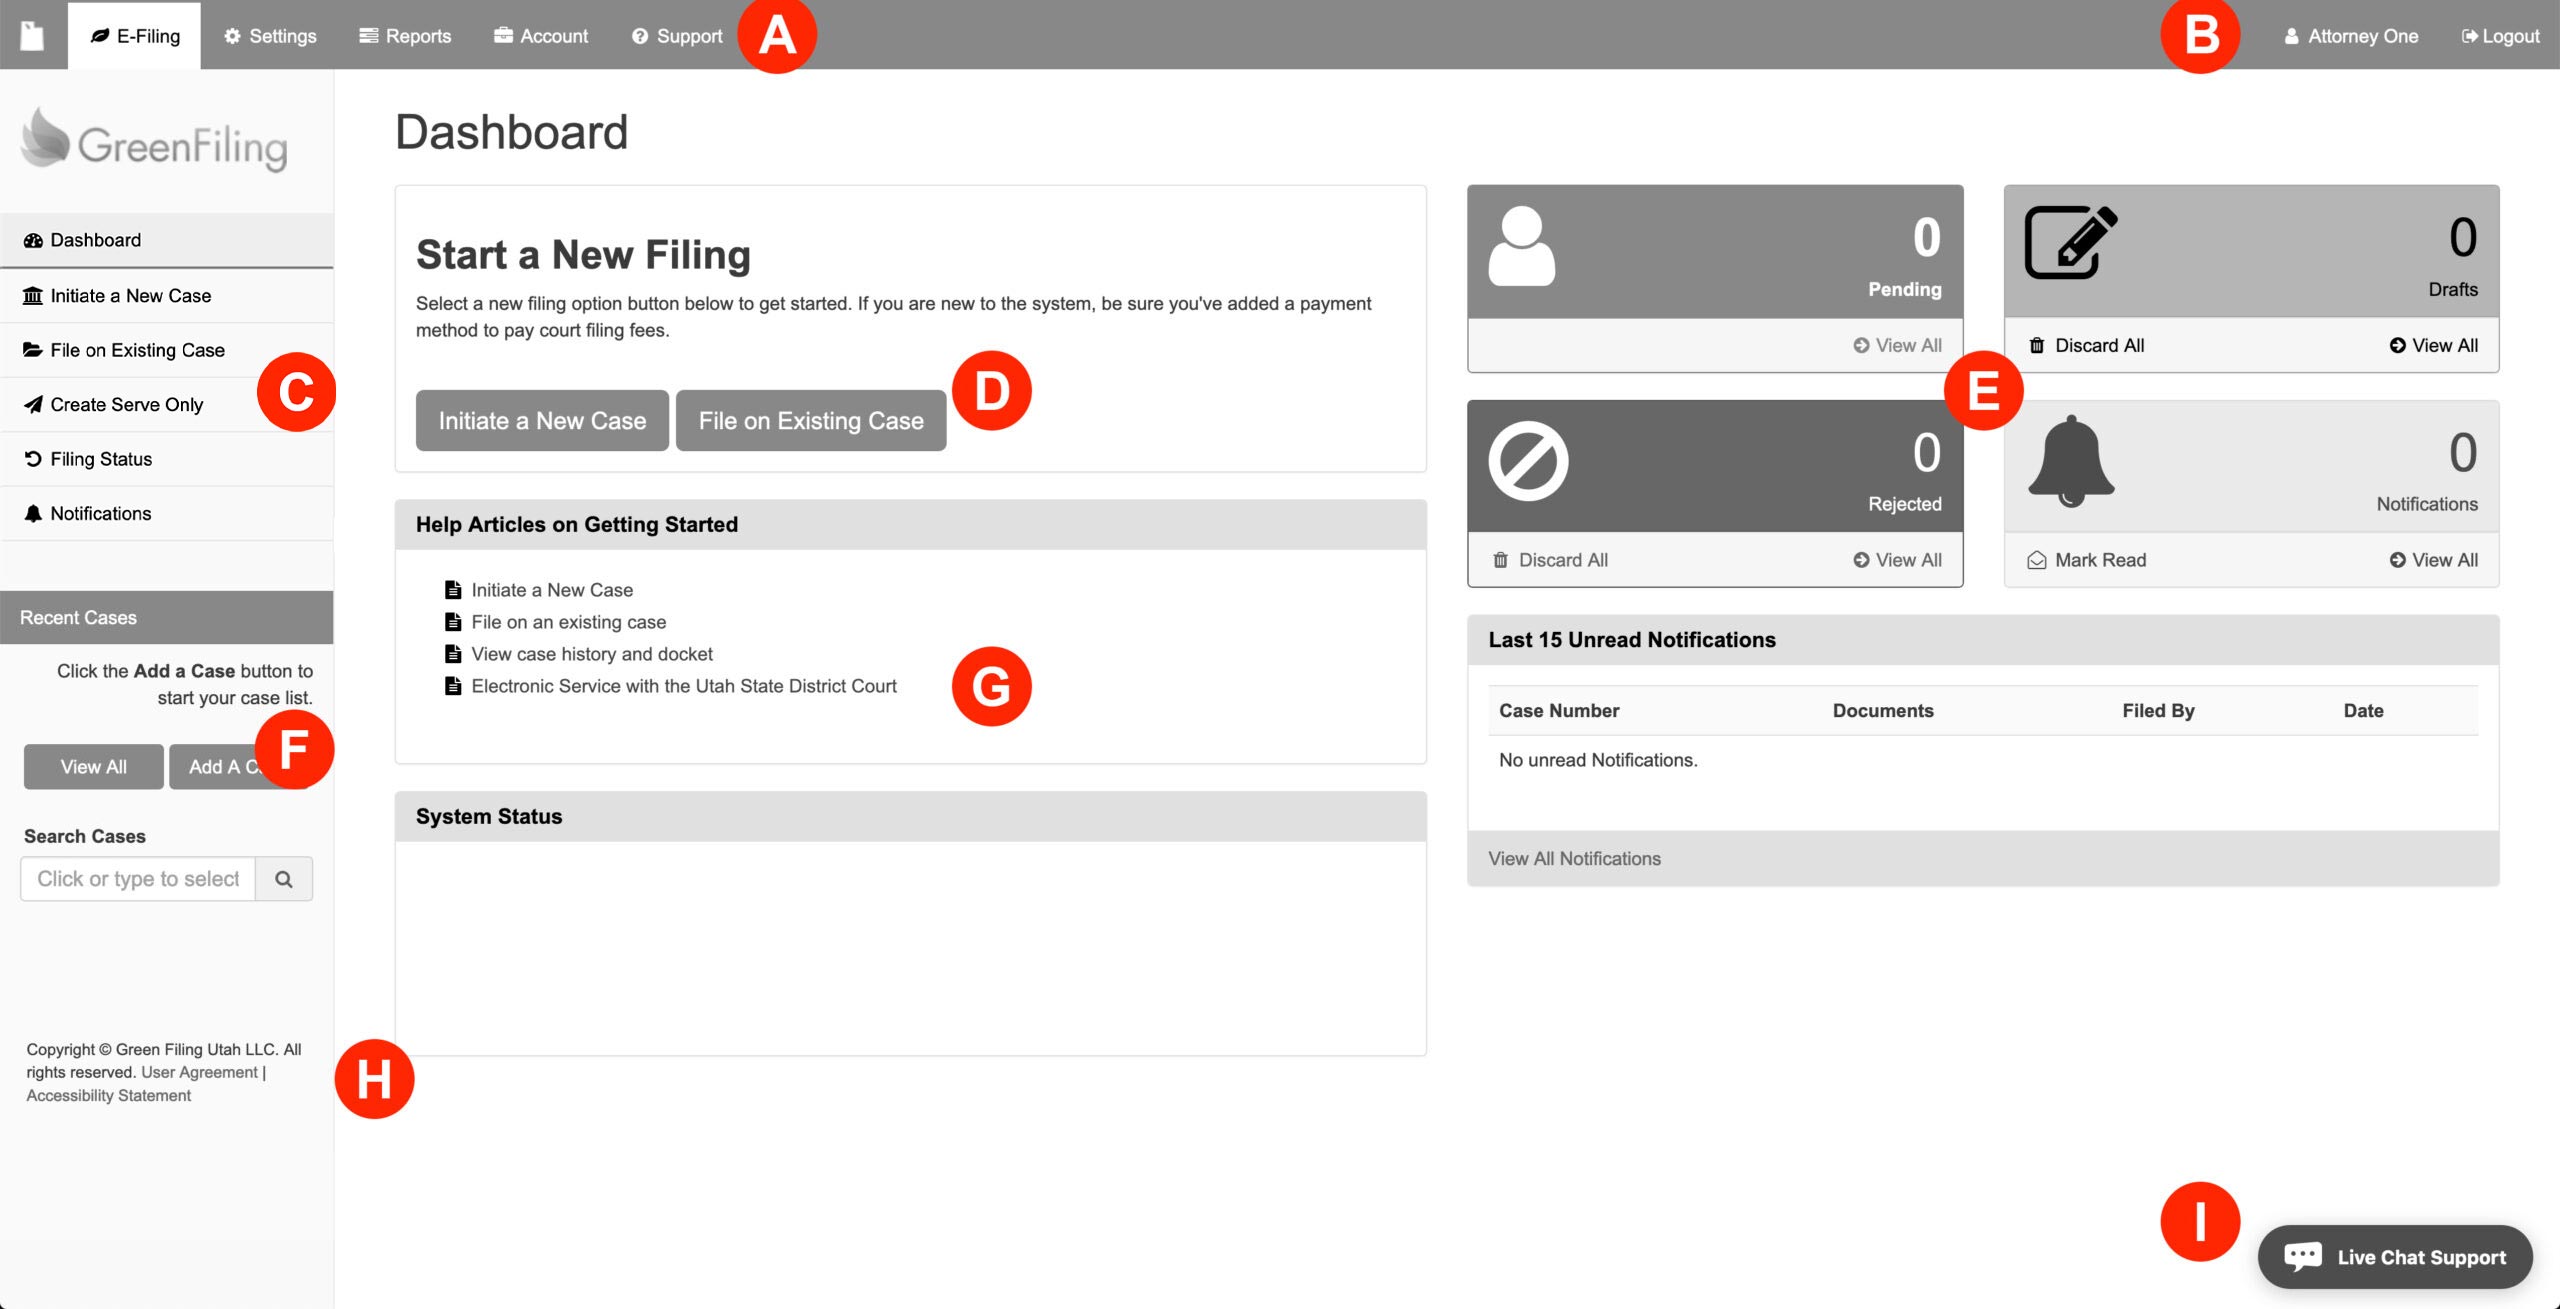
- Main Menu
- Username and Logout link
- Left Menu
- Quick Start Filing
- Notification Panel
- Case List
- Help Articles and System Status
- User Agreement
- Live Chat Support
A: Main Menu
On the upper left of the application is the e-Filing Menu to navigate users through the various tasks in the application.
E-Filing Tab: Clicking E-Filing at any time returns you to the Dashboard. From this screen, you may Initiate a New Case, File on an Existing Case, Create a Serve Only, view your Filing Status on filings, Notifications, and all Added Cases.
Settings Tab: Clicking Settings at any time allows a user to view/edit your Account Information, Edit User, Change Password, Manage Users, Payment Settings, User Preferences, and Party Address Book.
Note: Some functions are only available for accounts designated as a firm admin.
Reports Tab: Clicking Reports at any time allows a user to run the following reports: Filing Activity, Filing Activity by Case, Filing Activity by Client, Filing Activity by Payment Account, Filing Activity (Non-Accepted), Case List, and New Cases List.
Account Tab: While similar to the Settings tab, this screen is for Firm Admins. Here they may view/edit Account Information, Manage Users, Manage Payment Settings, view their firm’s Invoice List, and view/edit their Party Address Book.
Support Tab: Clicking Support at any time takes the user to our help site for information on using this application, and other general e-Filing questions.
B: Username and Logout Link
On the upper right of the application is the logged in user’s name and Logout link. For offices who might share computers, it is a good habit to double check the name at the top to verify the user is using the correct account for their filing.
C: Left Menu
The Left Menu of the application changes depending on the tab selected in the Main Menu. When on the Dashboard, the user will have the option to select the following: Initiate a Case, File on an Existing Case, Filing Status, and Notifications.
D: Quick Start Filing
The Start a New Filing panel on the dashboard allows a user to Add a Payment, Initiate a New Case, or File on an Existing Case from this panel as well.
E: Notification Panel
The Notification Panel on the dashboard allows a user to quickly review the number of Pending filings, Rejected filings, Drafts, and Notifications. Additionally, the user’s last 15 unread notifications populate in this section. Learn more…
F: Case List
Also located in the Left Menu of the Dashboard are your Recent Cases. The will be either the most recent cases or any favorites you have starred from the Case Lists screen. Additionally, the user may click the View All button to view all the cases added to the account, or click the Add a Case button to add any needed.
G: Help Articles and System Status
While there is always a Support tab in the Main Menu, the dashboard also has a panel with Help Articles on Getting Started. Use these five articles as a checklist of what’s needed to update and add on the account after creating one. Once completed, the user may electronically file on cases. Below the Help Articles is the System Status panel which gives periodic alerts if the court’s application is having issues that the user needs to be aware of.
H: User Agreement
If at any time, a user wishes to review our User Agreement it can be found on the Lower Left along with our Accessibility Statement on any page of the application in addition to the Dashboard.
I: Live Chat Support
As always, on the Lower Right of every page in our application is our free Live Chat Support for attorneys and their staff.