These instructions are to File on an Existing Case; meaning this case already exists in the court system. If one does not exist yet, you will want to Initiate a New Case.
These steps take you through the process of e-filing on an existing case that we have to retrieve from the Court’s system. Once the filing is sent to the court’s filing clerk for review, we’ll take a quick peek at our Filing Status screen.
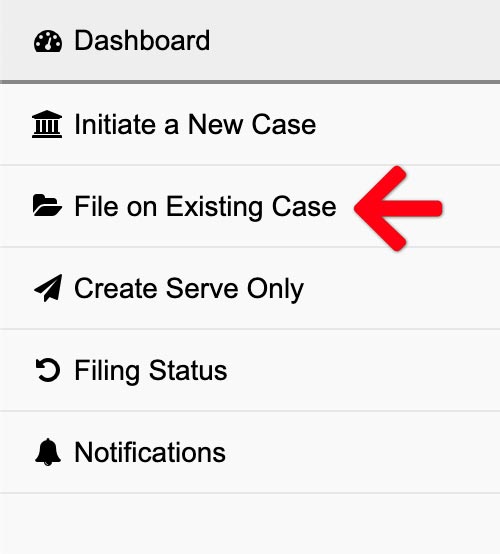
File on an Existing Case
From the Dashboard, click File on an Existing Case
1. Select Court & Case Type – Choose your case, or click add a case to retrieve your case from the court’s system.

Choose your case. If you do not see your case in the menu, click the Add a Case link.
Learn how to add a case to your account
2. Add Documents – Define, select, and upload the documents that make up your filing.
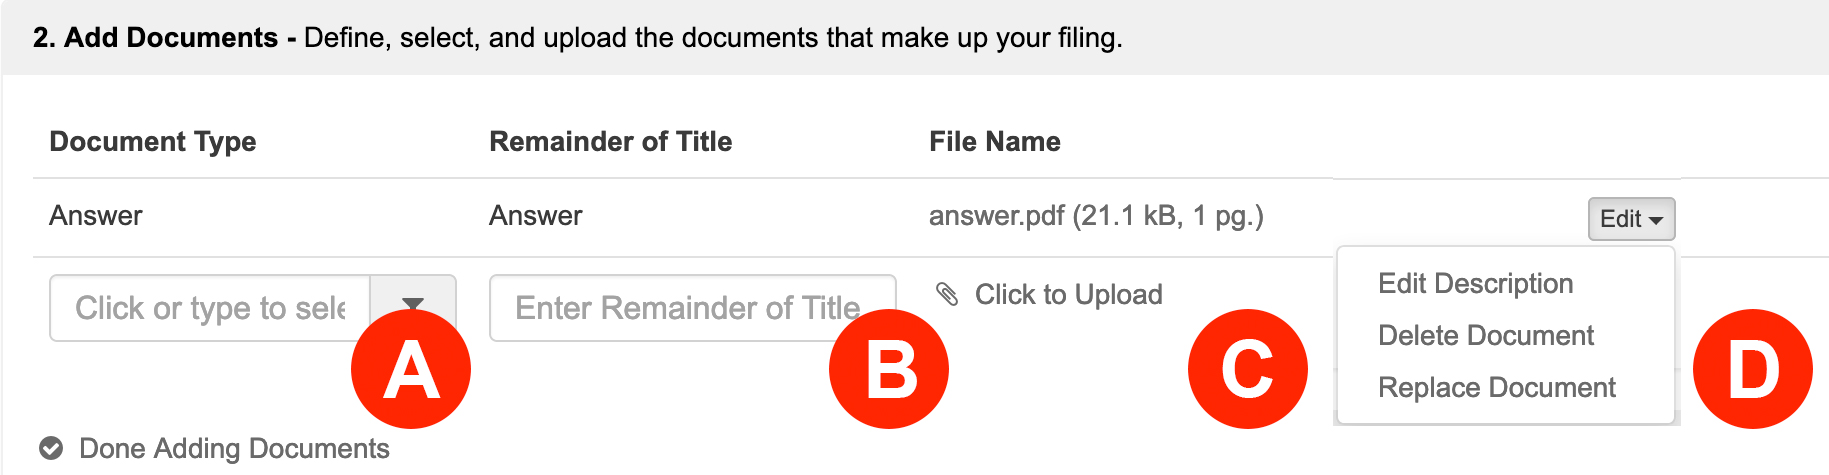
- Document Type – The list of documents you see available in the Document Type field is prescribed by the Court. If you don’t see the specific document type you are looking for then you’ll need to select the document type that most closely matches, or is somewhat generic in nature. If you enter some of the Document Type name in its form field, you will filter your choices down (ie. type ‘Petition’ to see petition choices). Some courts provide an option like “Other”, “Other Document Not Listed” or “Document – Other” which may work for you as well.
- Remainder of Title – After making your selection, type the true document title in the document description field.
- Click to Upload – Click the Click to Upload link to add your document. We’ll automatically convert most native file formats (i.e. Word, WordPerfect, JPG, PNG, GIF, TIF) into the Court’s preferred Adobe PDF format, upon upload.
- Edit – Click the Edit button to edit a description, delete a document, or replace a document.
3. Additional Info – Enter any additional information that is required for this filing type.
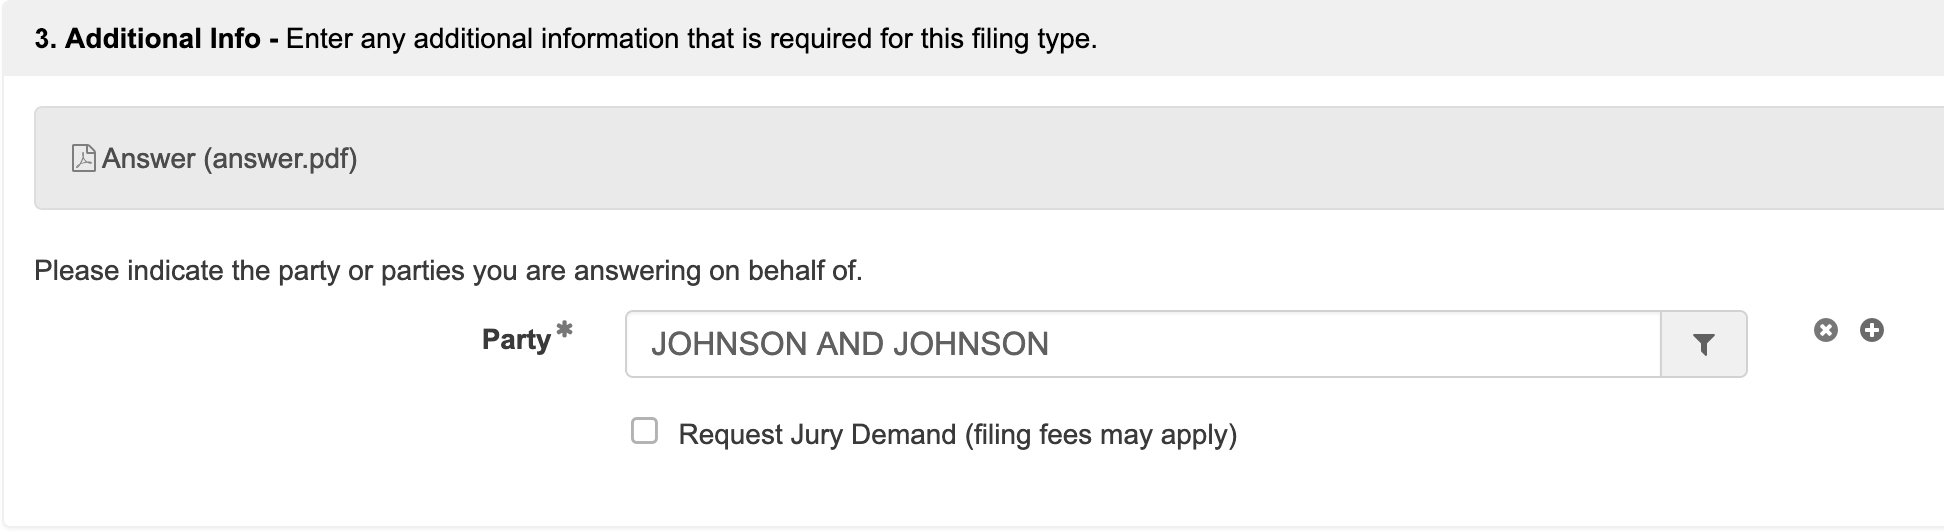
The Court requires that for some case types and / or document types the filer provide additional information. If additional info is required, the appropriate form fields will appear here and you are required to complete them. If no additional info is required, a message will display as such, and you may continue to the next step.
4. Mail Service and Additional e-Service – Serve documents by mail and / or electronically serve anyone not being served by the Court’s Notification of Electronic Filing (NEF).
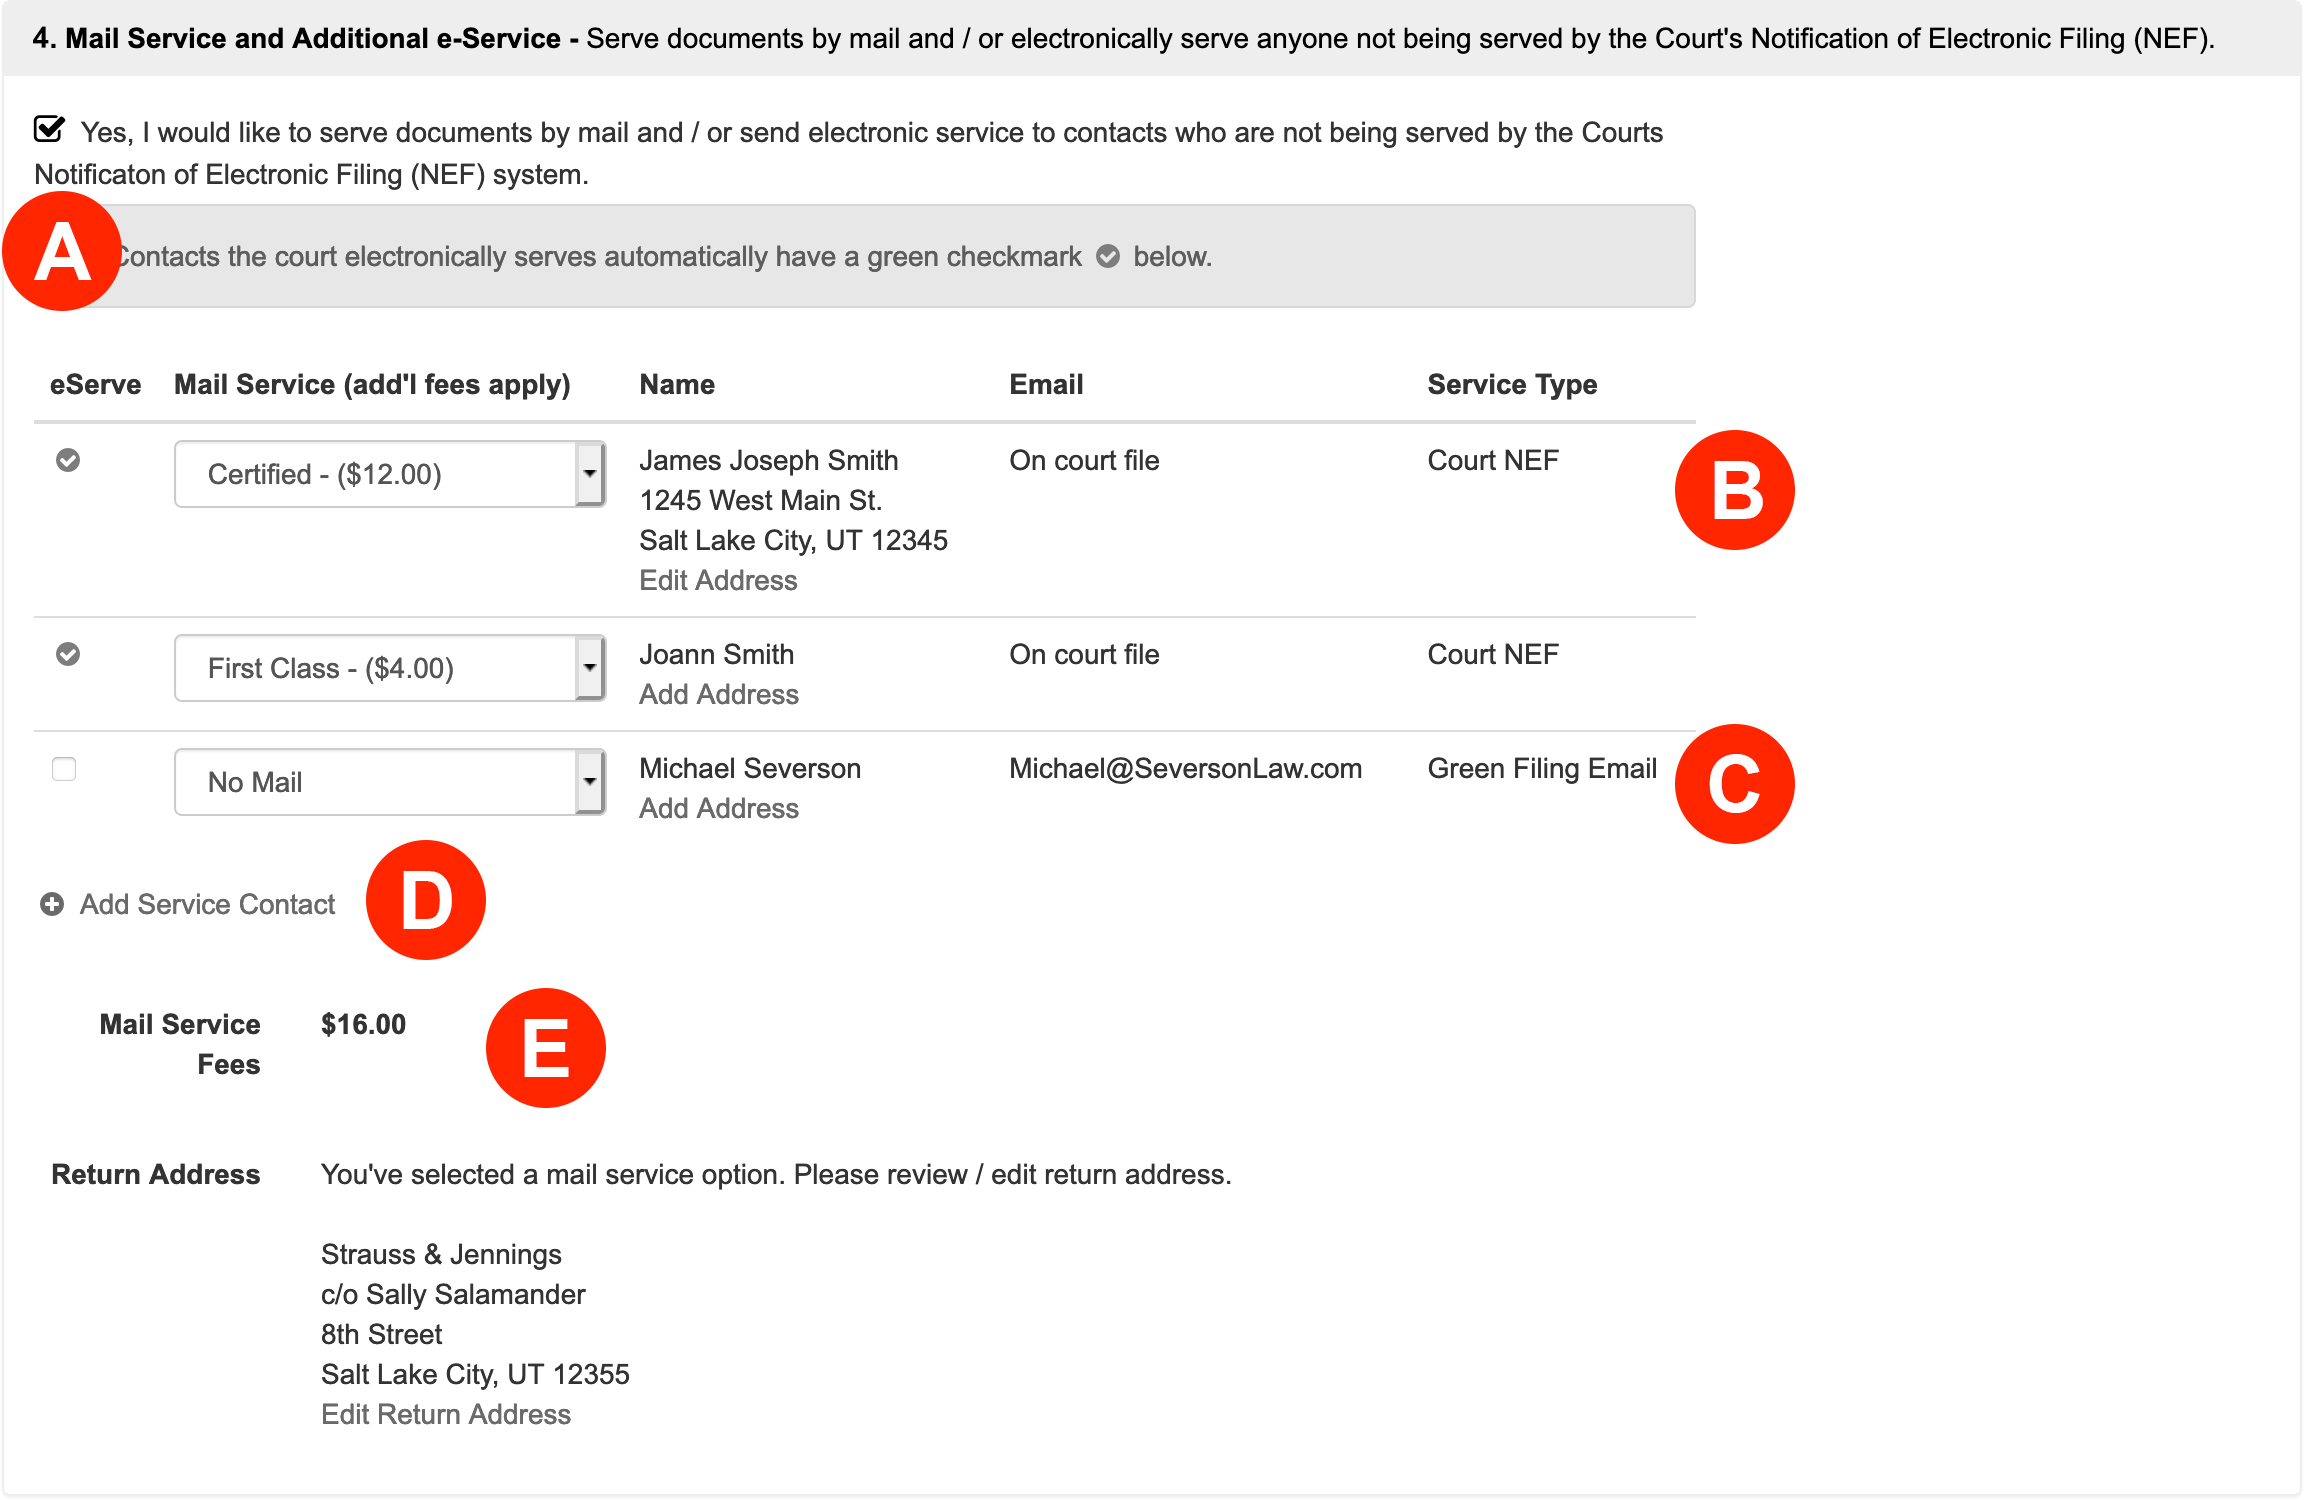
Filers have the option to both electronically serve anyone not being served by the Court’s Notification of Electronic Filing (NEF) and serve documents by mail.
- Check the box for Yes, I would like to send electronic service to contacts who are not being served by the Courts Notification of Electronic Filing (NEF) system. to view Court NEFs and any Service Contacts already added.
- Filers may now choose to send Court NEFs the documents via Certified or First Class Mail for an additional fee by selecting one of those types in the Mail Service column.
- If a user has added a Service Contact to the case that is not a Court NEF, the system lists them as a Green Filing Email in the Service Type column. Additionally, the filer may check the first box of that row to send them the document via e-Service or select a Mail Service type from the drop down.
- If the filer wishes to add a Service Contact not listed, or enter a different email for a Court NEF than the one that court has on file, the user may click the Add Service Contact link. The system will list this new contact as a Green Filing Email in the Service Type column.
- Mail Service Fees – Green Filing will invoice the filer the Mail Service Fees at the end of each month.
5. Filing Fees – Select a payment method to pay estimated fees.

Select or enter a payment method to pay court filing fees if there are any or certify that there aren’t any fees for the filing. Additionally, the user may add a new payment type in this section if necessary.
6. Review & Submit – Finalize your filing, review, and submit.
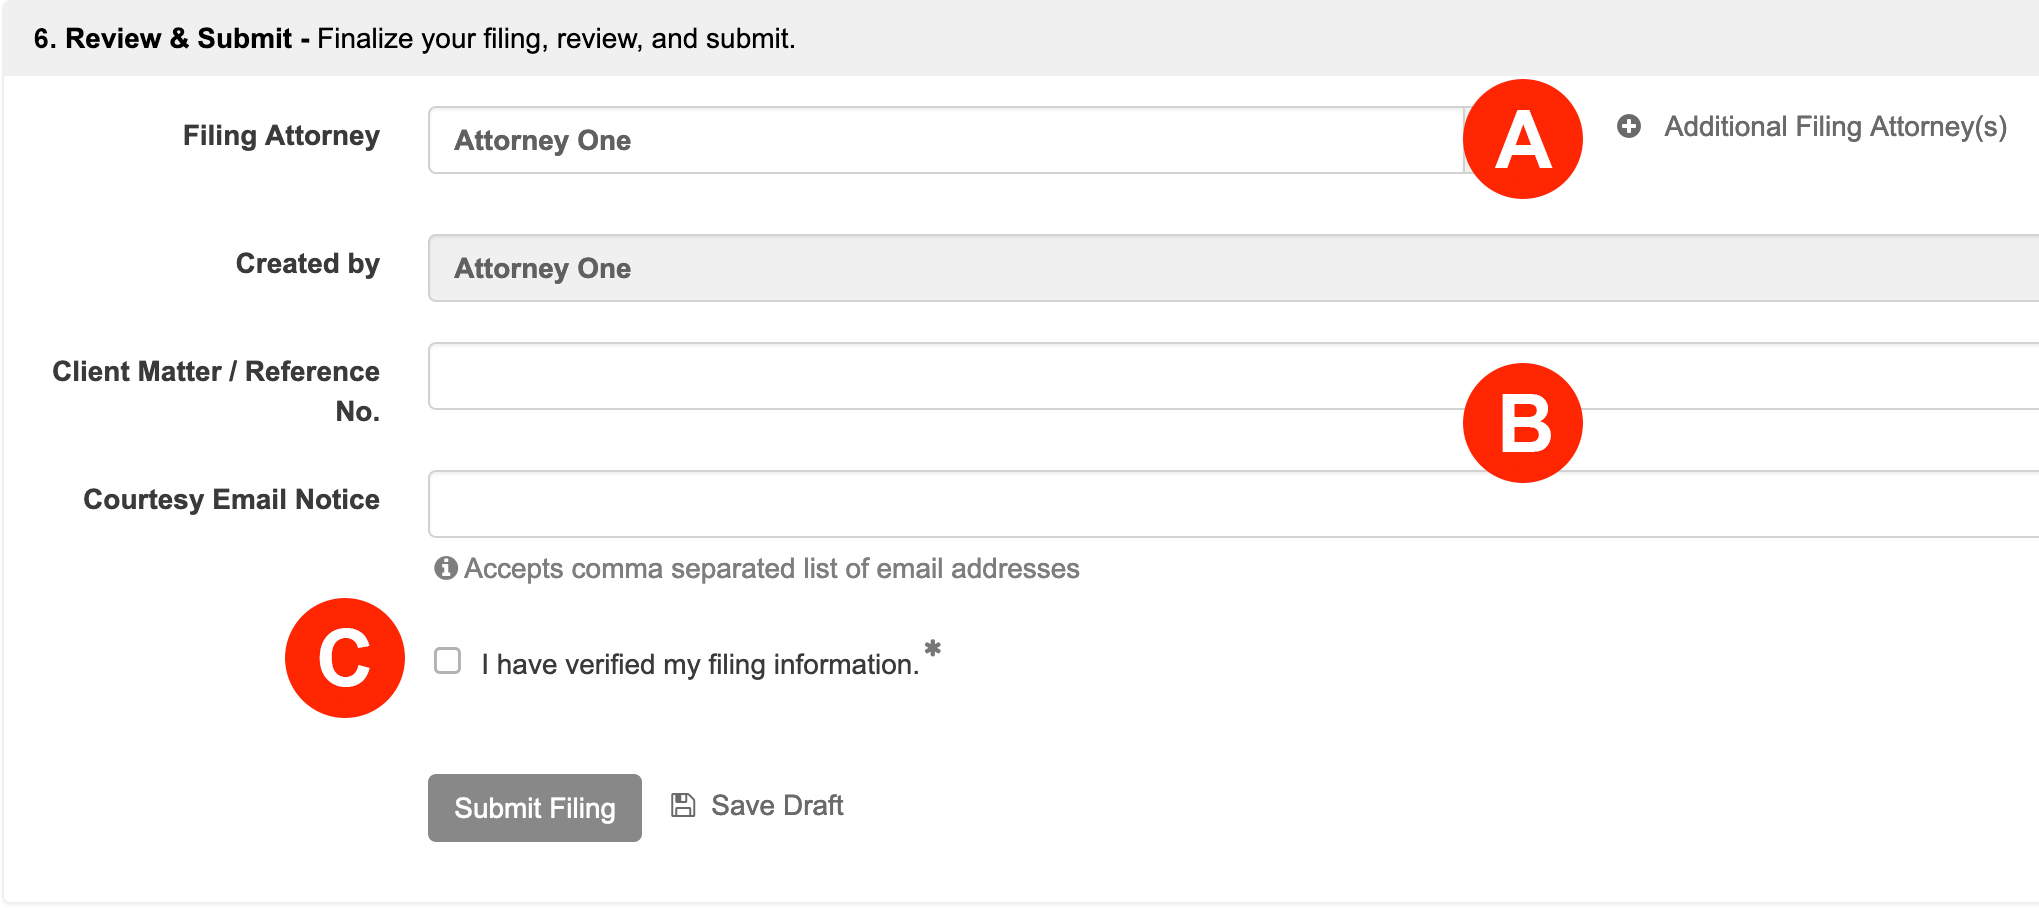
- If you are Filing for an Attorney select them from the menu. The filer may also click the Additional Filing Attorney(s) link to add more filing attorneys.
- If your firm uses any sort of Client Matter No, enter it here. If you want an unofficial copy of the filing to go to anyone associated with the case, like a client, enter their email(s) here.
- Review your entire filing for accuracy, and check the Verify box to acknowledge you have verified your filing information.
Click the Submit Filing button. Once you click the button, your filing is sent directly to the court’s filing clerk for review. Your filing will show Pending and you will get credit for the submission time once all documents are uploaded to the court. Once the court accepts the submission, the status will update to ACCEPTED and you will receive a filing receipt via email.
7. Filings with Writs
The court does NOT auto-accept filings with Writs. They place them in a special queue to be reviewed at a later time. If you have a time-sensitive filing, you might want to consider two (2) separate filings—one with the writ(s) and another with all remaining documents.